
Introduction
With the Winter 22 release, we have received an update called DI which can be used to achieve the same i.e. enable components to communicate with each other which are on the same app page with the help of little development and little configuration. The developer can simply expose the event to the app builder using XML file and Admin can configure the target component and interactions for the event.
For instance, If the user clicks on the button on one component we can receive event detail on another component.
Components of Dynamic Interaction
There are 4 major building blocks for DI :
- Source: The component that triggers the event.
- Target : Component which will receive the event.
- Event: On what action do you want to trigger an event for example such as a mouse click, or a button press.
- Interaction: An activity that happens between the source and the target.
Limitations
Before we look at an example of DI, let’s take a look at limitations :
- Dynamic Interactions is supported only on app pages.
- Only LWC custom components can be source components, but any component present on the page (Aura or LWC) can be a target.
- Dynamic Interactions isn’t supported on pages based on custom page templates.
- You can use expressions only for properties of type String, Integer, and Boolean.
- You can’t set a target property value as an array or list of values.
For more limitations please refer to salesforce documentation.
Develop Source LWC
sourceDI.html

Here we have simply created a lightning card and added a combo-box which will show a list of contacts.
sourceDI.js

Here we have written a wire function to fetch Contact data from the apex class and set combo-box options once data is made available.
“handleChange” is an event handler where we are firing a custom event which will be exposed in the app builder for interaction, it is called when the user selects a value from the dropdown.
Take a note we are adding an object in event.detail which will contain two properties :
- recordId
- name
Custom event is created with the name “testevent”.
sourceDI.xml
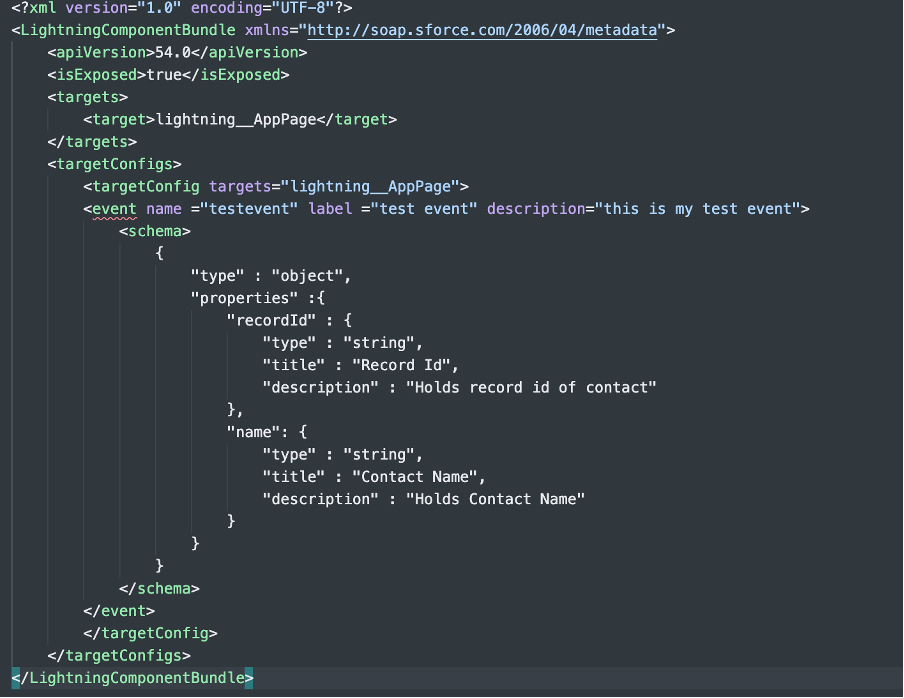
Here in the XML, we have exposed our event using the event tag. Make sure the name matches your custom event name.
The schema tag defines the structure of the event you are dispatching from your component. Take a note it needs to be done in JSON format.
Develop Target Component
targetDI.html
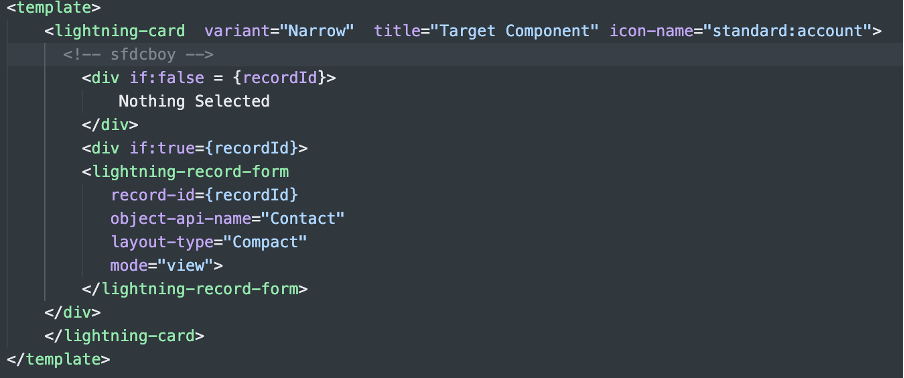
This is our target component that will be receiving interaction , here we have added a record form that will use record ID passed via event dispatched from source event.
targetDI.js

We need to create a public property which will actually hold the value.
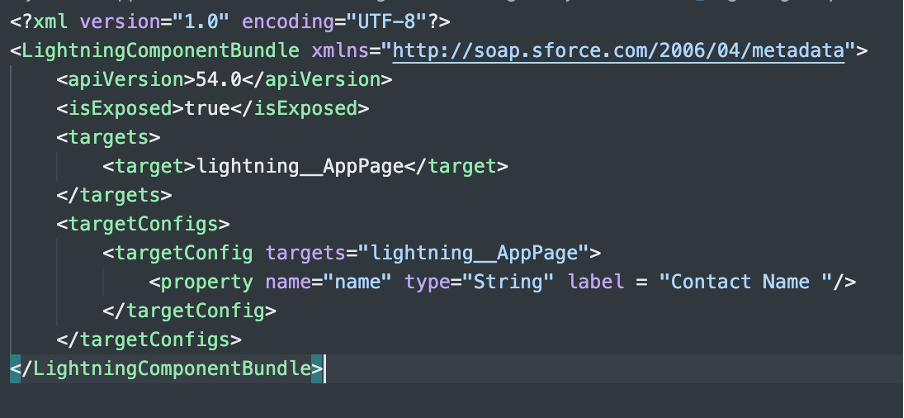
targetDI.xml

We are exposing property in the XML file so that in App builder we can put its value using event fired from source component
targetDI2.html
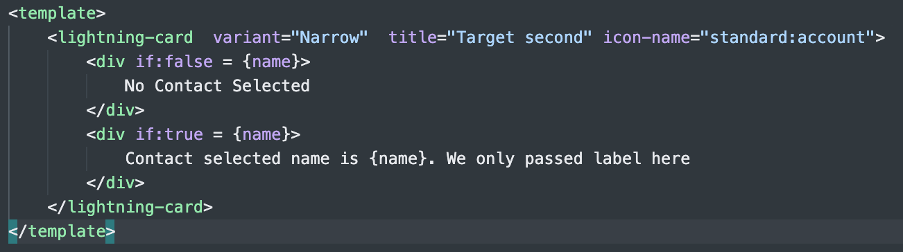
We have simply added text here.
targetDI2.js
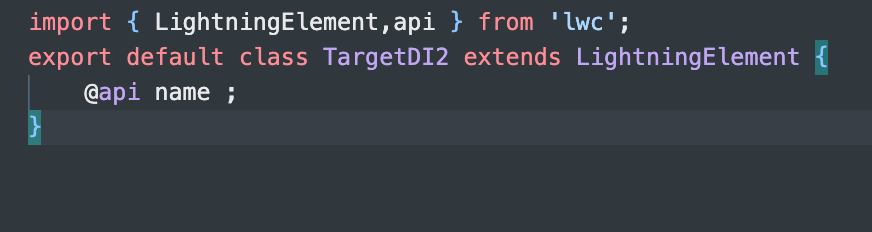
Similar to the targetDI component we are making the name public property here.
targetDI2.xml
Configure App Builder


Once all components are added to the app page, If you click on the Source component you will see new tab called “Interactions”.
Once we click on Add Interaction button it will ask us which component we want to send interaction to and what data we want to share with them.
If you look at the image below we have added interaction with the “TargetDI” component and the public property which we exposed in XML is populated with {!Event.recordID}.
Similarly, we can add multiple interactions interacting with multiple target events and populating data in their exposed properties.
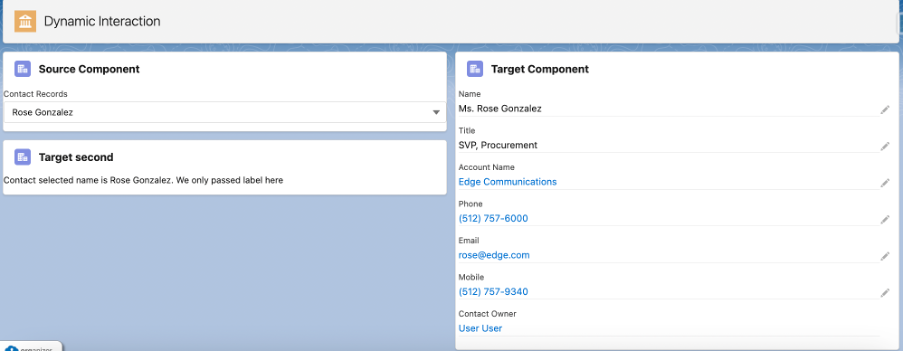
Outcome

Apex Class